
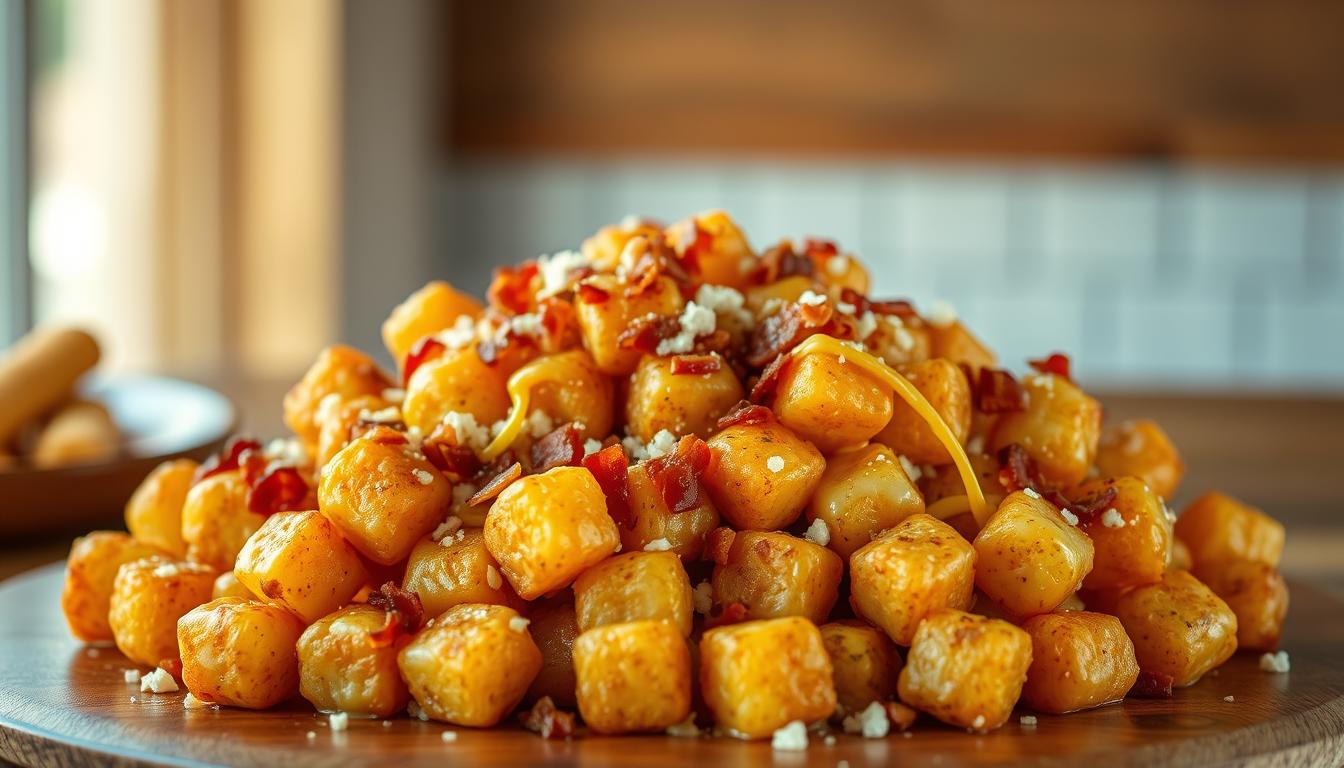
Deliciously Loaded Tater Tots: A Must-Try Recipe
There’s something magical when a crispy tater tot meets warm, gooey cheese. The snap of the crust and the melt-in-your-mouth flavors are amazing. These loaded tater tots turn ordinary nights into celebrations.
Imagine your kitchen filled with the scent of sizzling bacon and the crunch of tots. This recipe is more than food—it’s a ritual. It’s ready in just 30 minutes, perfect for any occasion. The secret is crispy edges, creamy centers, and toppings that make every bite a party.
Table of Contents
Key Takeaways
- Ready in just 30 minutes—perfect for busy days or last-minute gatherings.
- Serves 4, making it ideal for family dinners or casual entertaining.
- Customizable toppings like bacon, queso, and fresh herbs let you make it your own.
- Our recipe transforms simple ingredients into a comforting, shareable dish.
- Follows our mission of turning everyday moments into joyful, memorable experiences.
Why Loaded Tater Tots Are the Ultimate Crowd-Pleaser
Imagine the excitement when loaded potato tots show up at your next event. They’re crispy, cheesy, and smell amazing. These little treats are more than a snack; they’re a tradition that brings everyone together.

The History of Tater Tots in American Cuisine
In the 1950s, chefs turned potato scraps into tater tots. It was a simple start that grew into a beloved dish. Today, they’re a symbol of creativity and deliciousness.
What Makes a Truly “Loaded” Tater Tot Experience
The magic is in the mix: crispy tots, gooey cheese, smoky bacon, and tangy sour cream. A perfect bite has it all. Our easy tater tots recipe is a great example, with 32 ounces of tots, 1 cup queso, and 8 crispy bacon slices.
Why This Recipe Stands Out from the Rest
Our recipe is easy to make and full of flavor. Prep is quick, and you can add your own twist. It’s perfect for any gathering.
| Key Stats | Details |
|---|---|
| Prep Time | 10 minutes |
| Cook Time | 25-30 minutes |
| Servings | 6 hearty portions |
| Star ingredient | Hand-shredded cheddar (½ to 1 cup) |
“A great tater tot isn’t just food—it’s a shared story,” says food historian Clara Bennett. “They’re the backdrop to laughter and lingering conversations.”
Loaded tater tots are more than a recipe; they’re a tradition you can make your own. Whether baked or fried, they show that simple ingredients can create unforgettable moments.
Essential Ingredients for Perfect Loaded Tater Tots
Every loaded tater tots recipe starts with a mix of ingredients that make potatoes into crispy, melty treats. Begin with frozen tater tots, like Ore-Ida’s, for that perfect texture. Then, add flavors that match your cravings. The right ingredients are like love notes to your taste buds.

“A dish’s soul is baked into its ingredients. Choose wisely, and they’ll sing.”
- Golden tater tots: Choose a quality brand like Ore-Ida for crisp edges and fluffy centers.
- Cheese: Sharp cheddar’s tangy taste pairs well with potatoes. Use 1 cup shredded cheese for every 4 cups of tots for that gooey cheesy tater tots moment.
- Bacon: Crispy bacon adds smoky flavor. Use ½ cup chopped for a rich taste; swap with turkey bacon for a lighter option.
- Green onions: Their bright green spears add freshness and onion flavor.
Don’t forget the secret ingredients: ranch or sour cream tie flavors together. Greek yogurt is a lighter option with half the guilt. Jalapeños or chili add heat for those who like it spicy. These ingredients are more than just items on a list—they’re the foundation of comfort, turning meals into memories.
Equipment You’ll Need for This Recipe
Every kitchen has what you need to make the easy tater tots recipe shine at your next gathering. You don’t need fancy gadgets. A sturdy baking sheet is key, ready to hold golden-brown tots. Add a mixing bowl for tossing toppings and a sharp knife for cutting garnishes like scallions. That’s all you need to start your cooking journey.
- Baking sheet (non-stick or well-seasoned steel)
- Mixing bowls (for assembling toppings)
- Chef’s knife (for chopping fresh herbs or veggies)
Optional Equipment for Advanced Preparation
Want to level up your setup? Here are some extras:
- Mini muffin tins (mold tater tots into cute cups for dips)
- Wire cooling rack (for extra-crispy results)
- Cast-iron skillet (serve hot-from-the-oven tots straight to the table)
Even a simple baking sheet can turn store-bought tots into something amazing. The warmth of tradition comes alive as you set up these tools. Each one helps create moments that bring people together. The sizzle of cheese melting under your oven’s heat? That’s magic any kitchen can make.
Step-by-Step Loaded Tater Tots Recipe
There’s nothing quite like the warmth of a homemade loaded tater tots recipe simmering in your kitchen. Let’s transform frozen tater tots into golden-baked perfection. Start by preheating your oven to 425°F. This temperature ensures crispy exteriors without sacrificing the fluffy potato core.
Start by arranging 32 ounces of frozen tater tots in a single layer on a parchment-lined baking sheet. This step isn’t just about placement—it’s about giving each tot equal space to crisp. While they bake for the first 20 minutes, prep toppings like crumbled bacon or shredded cheese. The kitchen will fill with the buttery aroma of baking potatoes, a scent that promises comfort.
Preparing Your Tater Tots Base
- Combine 1 lb of cooked, seasoned ground beef with ½ diced onion and 1 minced garlic clove in a skillet—this savory base becomes the foundation of your loaded masterpiece.
- Spread 2 tbsp of taco seasoning evenly over the baking sheet’s surface before adding tots. This step infuses every bite with warm, smoky flavor.
Cooking Times and Temperatures
| Step | Time | Details |
|---|---|---|
| Bake base layer | 20 minutes at 425°F | Rotate the pan halfway for even browning |
| Add cheese topping | Last 5 minutes | Spread 2 cups Colby jack cheese over tots—this melts into a gooey blanket |
| Broil for finishing | 1-2 minutes | Watch closely to avoid burning the edges |
Adding Your Toppings for Maximum Flavor
Layer toppings like diced tomatoes or green onions after baking—heat-sensitive ingredients stay fresh this way. For a creamy touch, swirl ½ cup sour cream over the top layer just before serving. The final dish should glow with melted cheese and golden edges, ready to be shared around a cozy dinner table.
Pro tip: Store leftovers in an airtight container for up to 3 days. Reheat at 350°F for 10 minutes to restore crispiness.
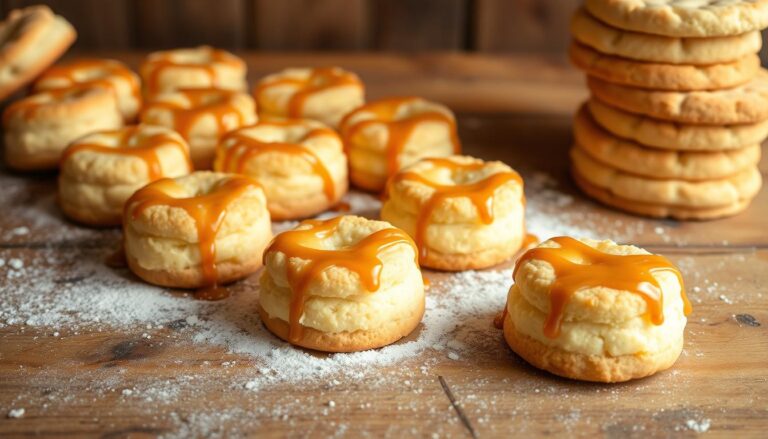
Mastering Homemade Tater Tots from Scratch
Turning raw ingredients into homemade tater tots is magical. Choose russet potatoes for their starch, which makes them fluffy inside and crispy outside. Delicious tater tots start with peeling potatoes and simmering them until they’re tender. Then, let them cool a bit before grating them, feeling the warmth as you shape them into rounds.
“The simplest ingredients become extraordinary when prepared with care.”
Here’s how to nail the process:
- Simmer russets in salted water until fork-tender—about 15 minutes.
- Drain, cool slightly, and grate into a bowl. Mix with flour, egg, and seasonings for binding.
- Shape into tots, pressing firmly into muffin tins. Bake at 425°F for 20-22 minutes until golden.
Patience is key—letting grated potatoes rest 10 minutes allows flavors to meld. For extra crispiness, line pans with parchment. These homemade tater tots store up to 5 days chilled, ready to reheat in a 350°F oven. Imagine friends leaning in, eager to taste your labor of love—their smiles make every step worth it.
Celebrate the ritual of creation. Whether serving as a family snack or a party hit, delicious tater tots crafted with care become memories in the making. Your kitchen becomes a stage where tradition meets innovation—one crispy bite at a time.
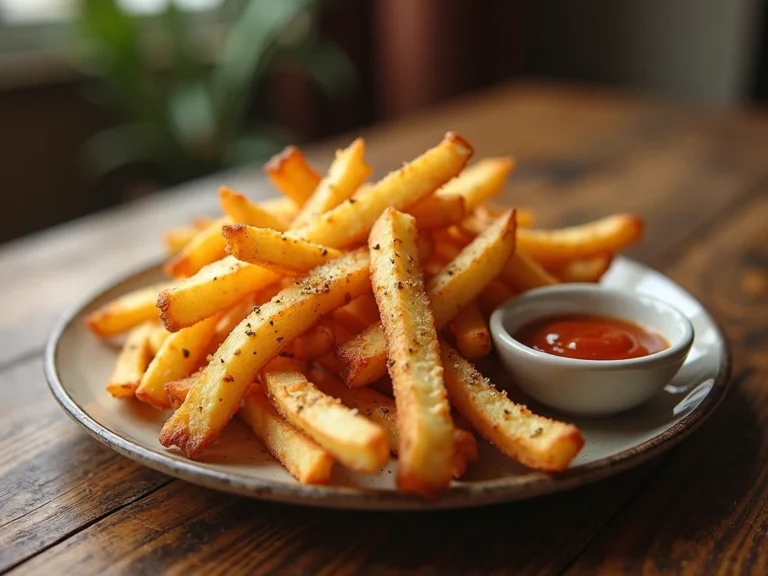
Creating the Perfect Crispy Tater Tots Texture
Imagine biting into a tater tot that crackles with every crunch—a golden-brown armor guarding its fluffy heart. Crafting this balance is where science meets comfort. We’re here to guide you through every step. Let’s uncover the techniques that turn ordinary tater tots into crispy tater tots that melt your heart (and your guests’ too).
The Secret to Crispiness: Oil Selection and Temperature
Warm your oven to 425°F (220°C)—the sweet spot where magic happens. Use oils like avocado or canola with high smoke points to avoid bitterness. A light drizzle before baking ensures every edge catches the heat. Pro tip: never skip preheating! A cold oven leaves you with soggy disappointment.
Baking vs. Frying: Pros and Cons
- Oven-Baked Tater Tots: Healthier, mess-free, and perfect for those craving crispiness without the grease. Just spread them in a single layer—no crowding!—and broil for 2-5 minutes at the end for that extra crunch.
- Frying: Deep frying delivers classic diner-style crunch but requires constant attention. If baking, aim for 20-25 minutes, rotating halfway.
Troubleshooting Common Texture Problems
| Problem | Solution |
|---|---|
| Soggy centers | Flip halfway through baking. Let them cool on a rack to air-dry. |
| Edges burning before centers cook | Lower heat to 400°F and tent loosely with foil. |
| Undercooked middles | Pat dry before baking—moisture is crispiness’s enemy. |
Remember: patience is key. The right tools—like a wire rack—transform oven-baked tater tots from ordinary to craveable. Now you’re ready to turn every batch into a crispy masterpiece. The aroma of golden-brown perfection awaits!
Cheese Combinations That Elevate Your Tater Tots
Imagine the moment cheese stretches between fork and plate—a golden, gooey ribbon promising pure comfort. That’s the magic of cheesy tater tots where every bite becomes a celebration of flavor. Whether you crave sharp tang or creamy silkiness, the right cheese transforms ordinary tater tots into loaded potato tots worth sharing with loved ones.
- Classic Comfort: Sharp cheddar blended with Monterey jack creates velvety pools of melt. Perfect for those who love a balanced, familiar indulgence.
- Smoky Heat: Pepper jack’s kick pairs with smoky gouda for a bold dance of flavors. Sprinkle on crispy bacon for a crowd-pleasing crunch.
- Creamy Dream: Blend queso with cream cheese for a decadent sauce that clings to every tot. Drizzle with hot sauce for extra depth.
| Cheese Option | Key Flavors | Pair With |
|---|---|---|
| Sharp Cheddar & Gouda | Tangy, nutty | Smoked paprika, green onions |
| Pepper Jack & Queso | Fiery, savory | Crumbled bacon, jalapeños |
| Cream Cheese Blend | Silky, buttery | Garlic powder, parsley |
Pro tips: Always hand-shred cheese for even melting—it’s worth the effort. For optimal stretch, melt cheeses at 200°F before adding to hot tater tots. Adjust ratios to your taste, but stick to ½ cup cheese per 28 oz tots for that perfect gooey balance.
Every bite of these loaded potato tots becomes a moment of joy—whether shared at family dinners or weekend gatherings. Let the cheese be your story, and let it melt into memories.
Bacon Lover’s Guide to Loaded Potato Tots
Imagine the sizzle of bacon meeting golden potato tots. The aroma alone can turn any kitchen into a feast. For bacon tater tots, start by choosing your star: thick-cut applewood-smoked or classic streaky bacon.
We recommend baking it at 400°F alongside your loaded potato tots for 15-20 minutes until crisp. No stove splatter required. Let it cool slightly before chopping into bits that crunch perfectly against gooey cheese.
Selecting and Preparing the Perfect Bacon
- Opt for center-cut bacon for even cooking
- Line a baking sheet with parchment paper to catch drips
- Pat bacon dry before baking for crisper edges
Beyond Basic Bacon: Flavor Variations
Go bold with maple-glazed bacon for a sweet-savory contrast—or try turkey bacon for a lighter crunch. For adventurous tastes, experiment with peppered bacon or Italian pancetta. Each variation adds layers to your loaded potato tots, transforming them into a craveable masterpiece.
“The first bite of bacon tater tots feels like a hug from your favorite comfort food.”
Pair these bites with tangy ranch or smoky barbecue sauce for a flavor explosion. Remember—leftover bacon bits can elevate tomorrow’s breakfast too. Every crispy morsel turns ordinary potato tots into unforgettable moments.
Creative Topping Ideas for Delicious Tater Tots
There’s magic in turning crispy tater tots into a masterpiece with the right toppings. Whether you’re revisiting childhood favorites or trying new flavors, these ideas make your delicious tater tots a hit. Let’s explore combinations that will make your loaded tater tots recipe a crowd-pleaser.
Classic American Toppings
Pile on nostalgia with flavors that feel like a warm hug:
- Sour cream’s cool creaminess cuts through golden crunch
- Ranch dressing drizzled in swirls with fresh chive confetti
- Bacon bits sprinkled like golden treasure over melted cheese
- Tomato chunks and green onions adding garden-fresh brightness
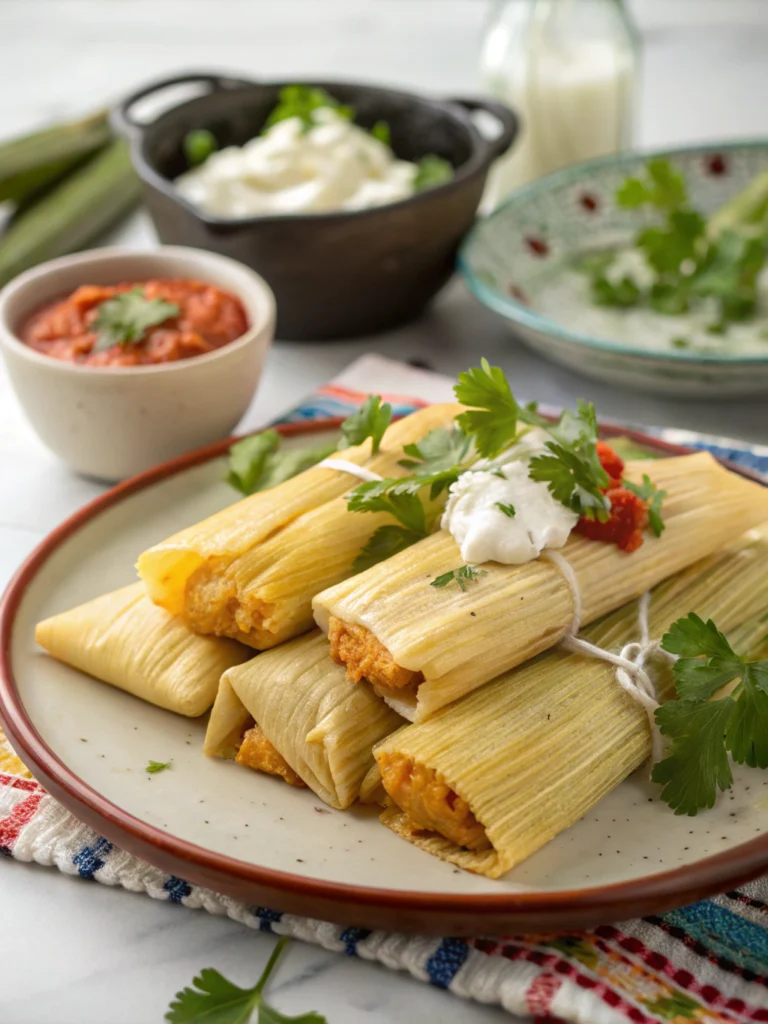
International Flavor Inspirations
Turn tots into a world tour with these globally inspired toppings:
| Region | Flavor Profile | Flavor Boosters |
|---|---|---|
| Mexico | Fiery & Creamy | Quesoо fresco, pickled jalapeños, salsa verde drizzle |
| Greece | Bright & Herbaceous | Tzatziki sauce, kalamata olives, oregano sprigs |
| Japan | Umami-rich | Teriyaki glaze, pickled ginger slices, sesame seeds |
Vegetarian and Vegan Options
Plant-powered goodness doesn’t mean compromise—try these:
- Plant-based cheese melts into gooey rivers over roasted mushrooms
- Avocado crema with cilantro for a dairy-free twist
- Black bean crumble and roasted red pepper strips
- Smoky cashew “bacon” bits for a crispy contrast
Experiment ly—mix and match these ideas to craft a loaded tater tots recipe that feels like a hug from your favorite kitchen. Every topping choice becomes a love note to those sharing the meal.
Serving Suggestions and Pairings
Make your loaded potato tots unforgettable with these pairing and presentation tips. Perfect for game days or cozy movie nights, the right combinations make your easy tater tots recipe a hit. It’s all about sharing great flavors.
“The best part of our easy tater tots recipe is how adaptable they are to any occasion—serve them as a hearty appetizer or a bold main dish,” says our test kitchen team. “Pair them with the right drinks and sides, and you’ll turn any plate into a moment to remember.”
Presentation Tips:
- Serve family-style on a rustic wood board—golden-brown tots glistening with cheese, surrounded by bowls of toppings like guacamole and salsa.
- Offer small ramekins of toppings for personalized builds, letting guests craft their perfect bite.
- For casual gatherings, arrange tots in paper cones for a playful, shareable touch.
- Crisp lagers or craft beers to balance creamy, savory flavors.
- Sweet tea or iced coffee to cut through richness.
- Spicy Bloody Marys for brunch spreads—ginger ale and celery salt elevate the experience.
Complementary dishes:
- A tangy citrus slaw with jalapeño-lime dressing to refresh the palate.
- Warm buttered rolls to offset the hearty texture of loaded tots.
- Light salads like arugula with lemon vinaigrette for contrast.
Remember—each serving is 6 ounces of pure comfort. Whether you’re sharing them with friends or savoring a quiet meal, these loaded potato tots become a canvas for connection. Let the crisp edges and melty cheese spark stories, laughter, or quiet moments. Bon appétit!
Nutritional Information and Dietary Adaptations
Every bite of your loaded tater tots recipe is special. It’s about both taste and health. Let’s look at how to enjoy it without overdoing it. Here’s what you get in one serving (1½ cups) of our classic recipe:
| Nutrient | Per Serving |
|---|---|
| Calories | 570 |
| Protein | 26g |
| Carbohydrates | 37g |
| Fat | 35g |
| Sodium | 615mg |
“Small swaps transform classics into meals that nourish without sacrificing joy.” – Nutritionist Emily Carter
Refining the Recipe for Balance
Do you love the loaded tater tots recipe but want something lighter? Here are some changes you can make:
- Swap half the tater tots with roasted sweet potatoes for natural sweetness and fiber.
- Air-fry at 400°F for 15 minutes—crispy results with 40% less oil.
- Top with sautéed spinach or roasted veggies to boost vitamins.
Adapting with Care
Everyone can enjoy homemade tater tots. Here’s how:
- Gluten-free: Use certified gluten-free frozen tots or make your batch with Bob’s Red Mill gluten-free flour.
- Dairy-free: Swap cheese for Miyoko’s vegan cheddar for melty texture without dairy.
- Low-sodium: Opt for no-salt-added ingredients and season with herbs like garlic powder.
Make choices that make you happy. Whether you stick to the original or make changes, it’s all good. Every tweak keeps the fun alive while respecting your body.
Conclusion: Perfecting Your Loaded Tater Tots Experience
There’s something magical about sinking your teeth into crispy, cheesy tater tots. Every bite is a celebration of comfort and creativity. From the golden crunch of baked tater tots at 425°F to the endless topping possibilities, this dish transforms simple ingredients into a memorable meal. Whether you’re crafting a pizza-inspired casserole with sausage and 14 oz pizza sauce—or a creamy chicken version with 2 cups of cheddar—every choice adds personal flair.
These loaded tater tots recipe variations let you experiment freely. Sprinkle extra cheese, layer bacon, or blend flavors like ranch and sausage. Even small tweaks turn ordinary frozen tater tots into a feast. Remember, whether you’re serving 4 or 8, the key is balancing textures: crisp edges, creamy fillings, and toppings that make every forkful exciting.
Sharing these bites with friends or family turns meals into moments. Imagine the stretch of melted mozzarella or the savory scent of baked toppings—details that make gatherings special. Let your loaded tater tots recipe become a canvas for your creativity, proving that even simple dishes can spark joy. Every batch is a chance to connect, whether it’s a weeknight treat or a party centerpiece. Bake with warmth, share generously, and let your kitchen become a space where delicious tater tots and laughter go hand in hand.
FAQ
Can I use frozen tater tots for my loaded tater tots recipe?
Absolutely! Frozen tater tots are perfect for this recipe. They are designed for convenience and crispiness. Just make sure to follow baking instructions for the best results.
What type of cheese works best for loaded tater tots?
Cheddar is a classic choice, bringing a rich, tangy flavor. You can also try Monterey Jack for a smooth melt. Or, mix different cheeses for added depth. Don’t forget about queso for an ooey-gooey experience!
How can I make my tater tots crispy?
To achieve crispy tater tots, spread them in a single layer on a baking sheet. Use a high oven temperature. Consider tossing them in a bit of oil for added crunch.
Can I customize the toppings for my loaded tater tots?
Definitely! The beauty of loaded tater tots lies in their versatility. You can add toppings like bacon, sour cream, chives, guacamole. Or even go for international flavors like nacho cheese, chorizo, or tzatziki.
Are there healthier options for loaded tater tots?
Yes! You can make your loaded tater tots healthier. Opt for sweet potato tots, use less cheese, or add more vegetables like roasted peppers or mushrooms as toppings.
How can I ensure my bacon stays crispy when adding it to the tater tots?
Oven-baking your bacon is a great method to achieve that perfectly crispy texture. Just make sure to chop it into bite-sized pieces before adding it to your tater tots.
What equipment do I need to make loaded tater tots at home?
You’ll need a reliable baking sheet, mixing bowls, and a good knife. Optional tools like wire cooling racks or mini muffin tins can be helpful if you want to get creative!
How do I serve loaded tater tots to make them more appealing?
Presentation matters! Try serving them on a rustic wooden board, individual ramekins, or even in paper cones. Pair them with refreshing beverages to enhance the overall experience.
Can I prepare loaded tater tots ahead of time?
Yes, you can prep your toppings and bake the tater tots a bit earlier in the day. Just reheat them in the oven before serving to restore their crispy texture!
What drinks pair well with loaded tater tots?
Crisp lagers, spicy Bloody Marys for brunch, or even creamy milkshakes make excellent companions to loaded tater tots. They enhance the flavor experience.


vibracion de motor
Aparatos de calibración: fundamental para el rendimiento suave y productivo de las equipos.
En el ámbito de la tecnología moderna, donde la eficiencia y la fiabilidad del aparato son de suma trascendencia, los dispositivos de ajuste cumplen un rol vital. Estos aparatos especializados están diseñados para equilibrar y fijar partes móviles, ya sea en maquinaria productiva, vehículos de traslado o incluso en aparatos hogareños.
Para los especialistas en mantenimiento de equipos y los ingenieros, trabajar con dispositivos de calibración es crucial para promover el funcionamiento uniforme y confiable de cualquier aparato giratorio. Gracias a estas alternativas avanzadas sofisticadas, es posible limitar significativamente las sacudidas, el sonido y la presión sobre los sujeciones, mejorando la duración de piezas costosos.
Asimismo significativo es el rol que cumplen los equipos de equilibrado en la soporte al comprador. El soporte técnico y el conservación constante utilizando estos equipos habilitan dar soluciones de excelente estándar, elevando la contento de los compradores.
Para los dueños de emprendimientos, la aporte en equipos de balanceo y detectores puede ser esencial para incrementar la eficiencia y rendimiento de sus equipos. Esto es principalmente significativo para los inversores que administran medianas y intermedias emprendimientos, donde cada punto importa.
Asimismo, los dispositivos de equilibrado tienen una extensa utilización en el ámbito de la prevención y el gestión de calidad. Facilitan detectar potenciales fallos, evitando arreglos onerosas y averías a los dispositivos. También, los resultados recopilados de estos dispositivos pueden aplicarse para optimizar métodos y aumentar la reconocimiento en buscadores de exploración.
Las sectores de utilización de los equipos de equilibrado comprenden variadas ramas, desde la elaboración de bicicletas hasta el monitoreo ambiental. No interesa si se refiere de enormes elaboraciones industriales o reducidos talleres de uso personal, los equipos de balanceo son necesarios para proteger un desempeño óptimo y sin riesgo de fallos.
Sweet blog! I found it while searching on Yahoo News. Do you have any suggestions on how to get listed in Yahoo News? I’ve been trying for a while but I never seem to get there! Thanks
Have you ever considered about adding a little bit more than just your articles? I mean, what you say is valuable and all. However imagine if you added some great photos or videos to give your posts more, “pop”! Your content is excellent but with images and videos, this site could certainly be one of the best in its field. Very good blog!
Hi there are using WordPress for your blog platform? I’m new to the blog world but I’m trying to get started and create my own. Do you need any coding expertise to make your own blog? Any help would be greatly appreciated!